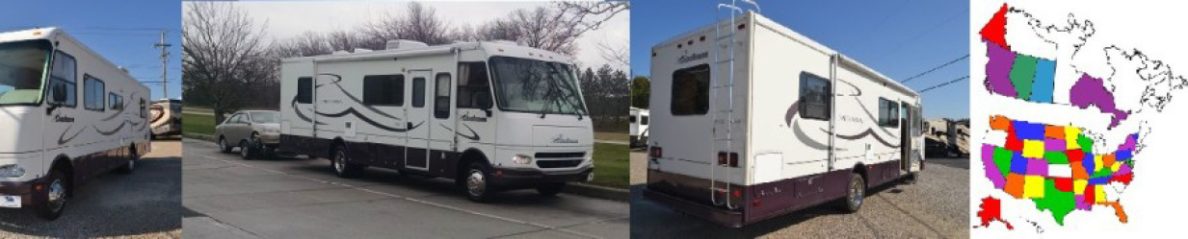
 I purchased a used one year old Acme EZE-TOW dolly last year, it came with surge brakes and a spare tire. I’m very happy with the dolly and have put almost 10k miles on it in the year that I’ve owned it. About 1/2 of these miles were in mountainous terrain where the dolly brakes were used extensively.
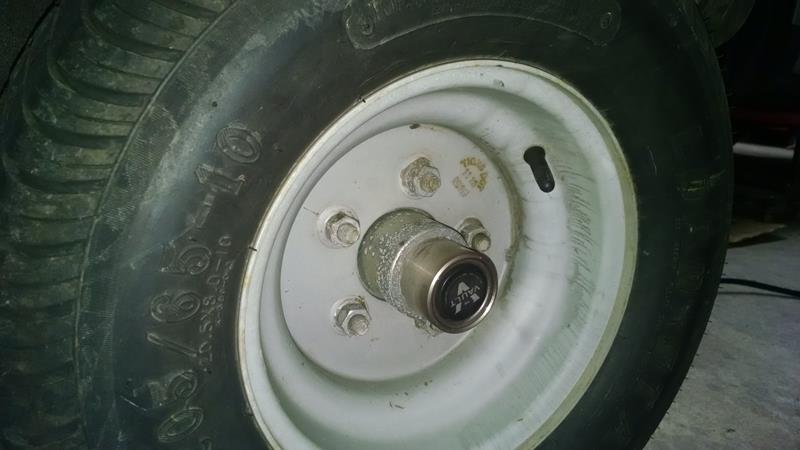
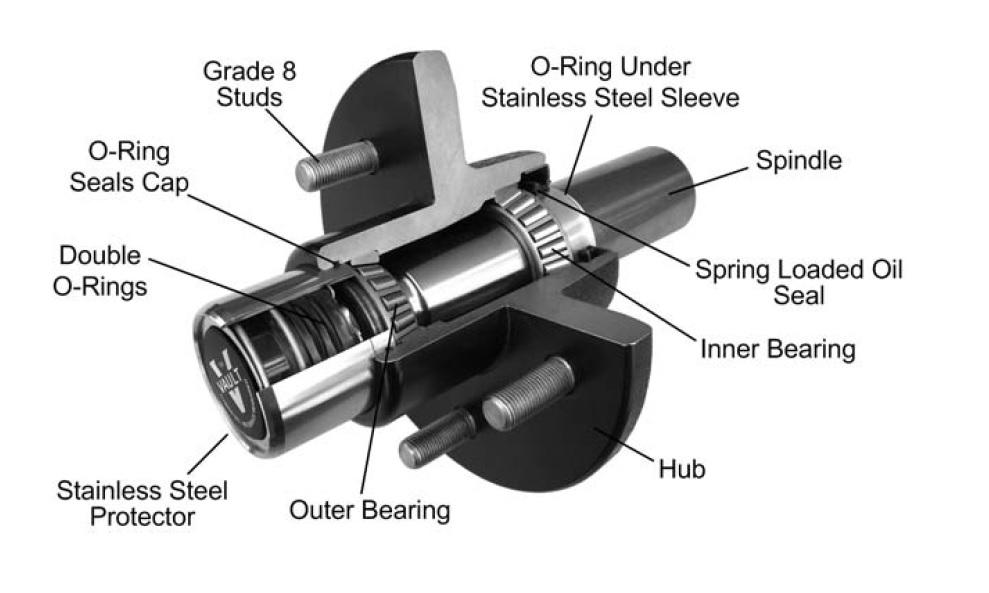
This dolly comes with the Vault wheel bearings/axle assemblies by UFP. The Vault grease system uses a small spring loaded piston to keep a little bit of pressure inside the axle (prevents water from getting in the bearings). The status of the pressure system is easy to determine, simply look at the hub. The black piston should be protruding 1/8 inch or so from the center of the hub. If its flush with the hub, then there’s no pressure.
If there is a lot of black streaking on the wheel, this is a sign of grease leaking past the axle seals.
During our last trip, I noticed a grease leaking on the left side. I also noted with my TPMS that the left brake was running hotter than the right. When we got home, I decided to look into it and see whats going on. Here’s what I found:
INSPECTING / REPLACING THE BRAKES
The Vault piston on the left wheel was even with the hub, the right wheel was extended about 1/8 inch. The left side has obviously leaked.
When I removed the wheels, there was black streaking and grease on the inside of the left wheel. The right wheel was ok. It was obvious the left side was leaking from the inner seal.
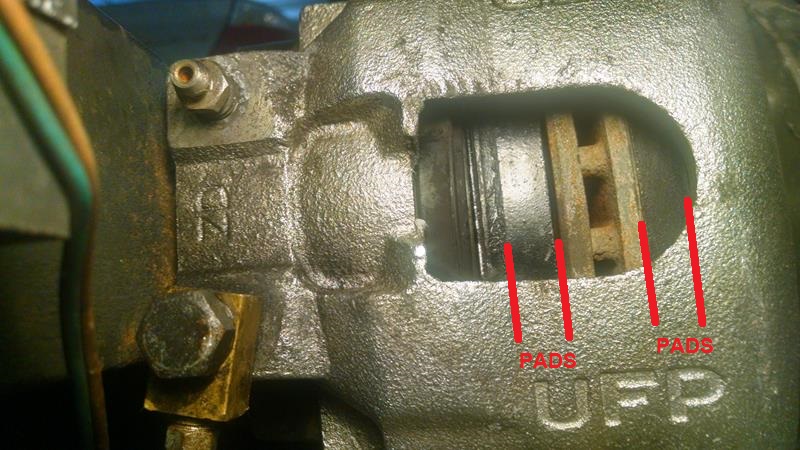
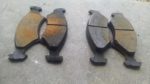
Looking at the brake pads, On the left side, the outer pad was worn almost to the metal, the inner pad was worn about 1/2 through its life. Because of this wear, it was obvious the left side has been binding.
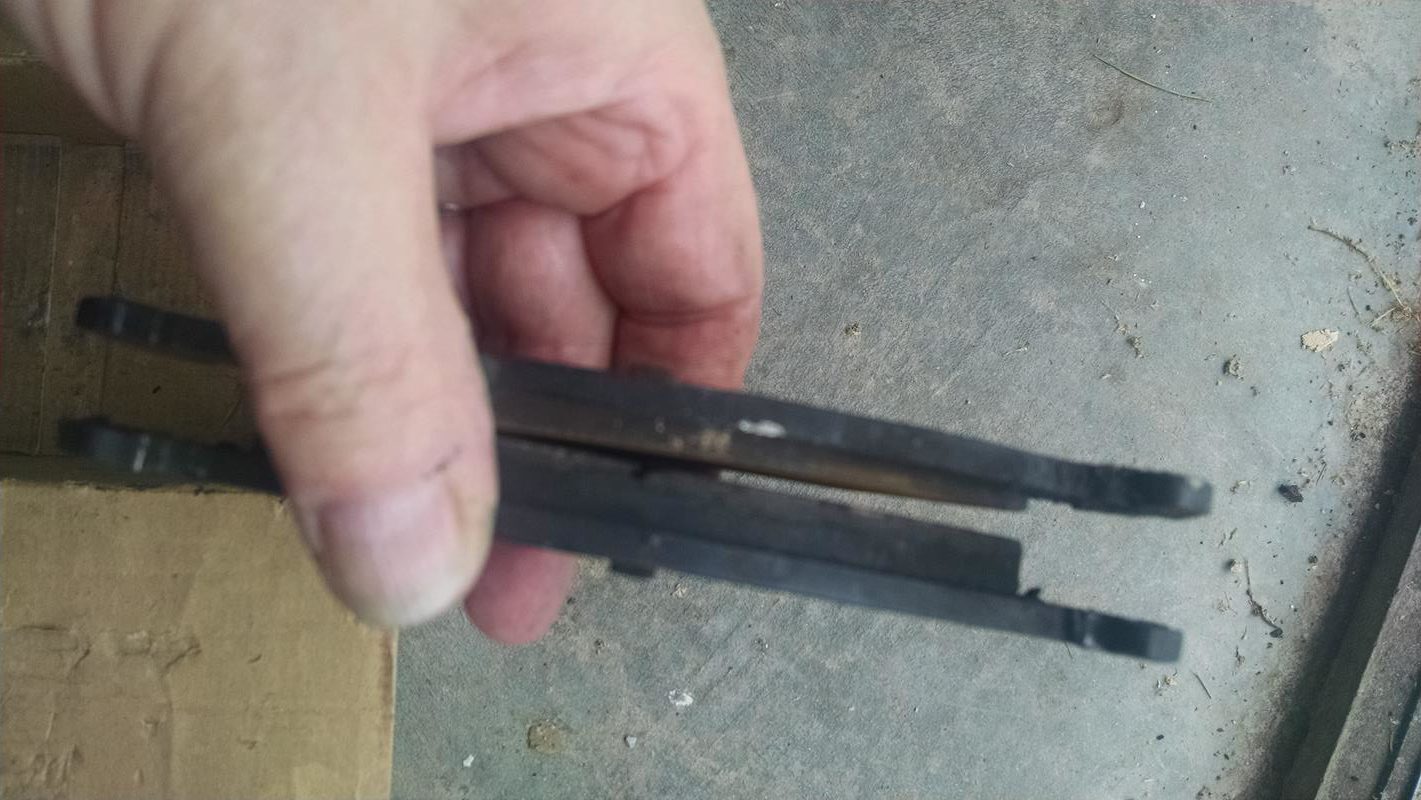
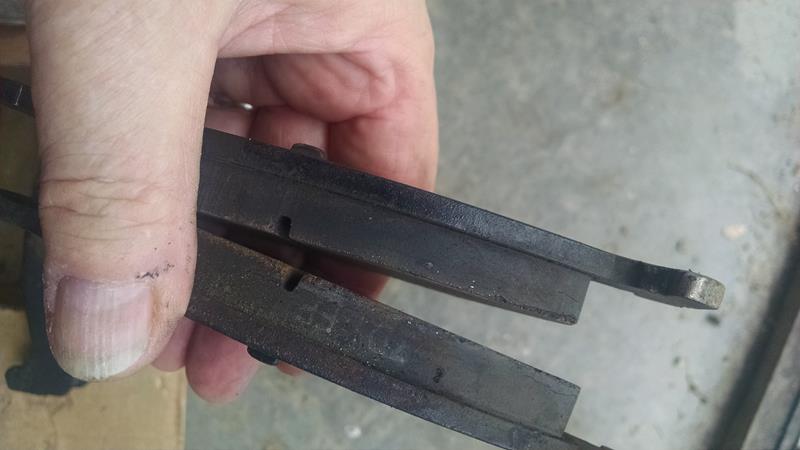

The right side pads look almost brand new with very minor wear. This is about what I was expecting to see on both side.
I decided to replace the pads on both sides, but I was only going to disassemble the left axle to inspect bearings and replace the seals.
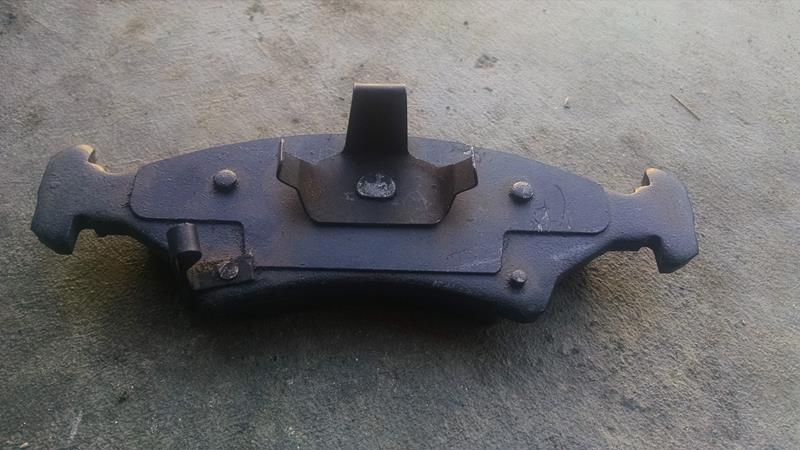
The Acme EZE-TOW dolly uses the same pad as a 1997-2000 Kia Sephia. You may need to cut off the low pad warning spring and the caliper clip.
REMOVING THE BRAKE CALIPERs
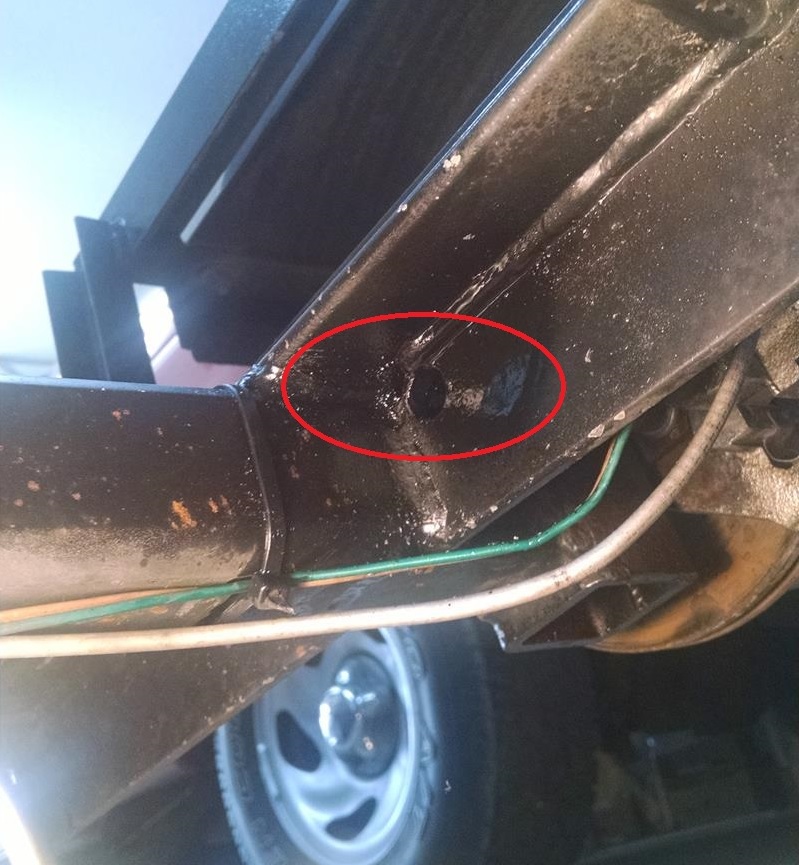
When I talked to the tech at UFP, I told him what a real pain in the $%^&$# it was to get the caliper bolts out (the two Allen bolts that hold the caliper assembly to the axle)
He recommended I drill a large hole in the lower frame s, then I could get a socket extension onto the Allen cap screws. BAM.
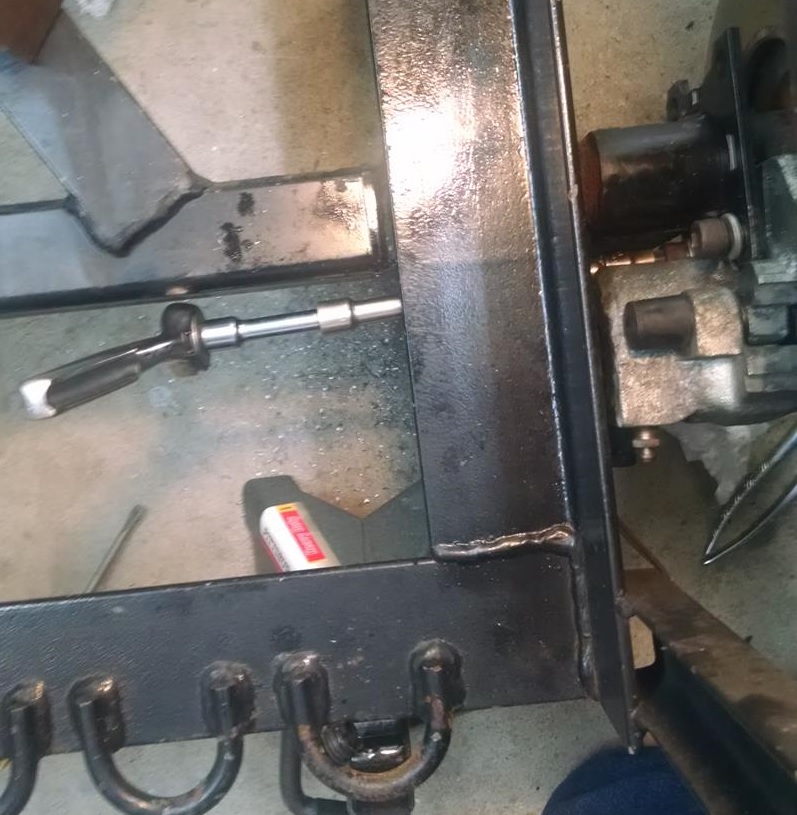
ALSO- note the original bolts are held in with lock-tight. I was able to get the bolts out, but it was a real %$%&#*@#(.
When the calipers are off, remove the spring clip and the caliper slide will slide out of the housing.
Don’t forget to clean the pins and the bushings, then put a very thin coating of caliper lube on the pins.
Reassemble with new pads.
I did not use lock-tight when I reassembled. I used lock washers and tighten the bolts.
REBUILDING THE AXLE and BEARINGS
Before beginning, you may want to review these two documents
2) Rear seal
NOTE – The folks at UFP were very helpful and gave me some valuable insight on what needed to be done to service the axle. They provided replacement parts for the axle (seals grease, etc) under the warranty.
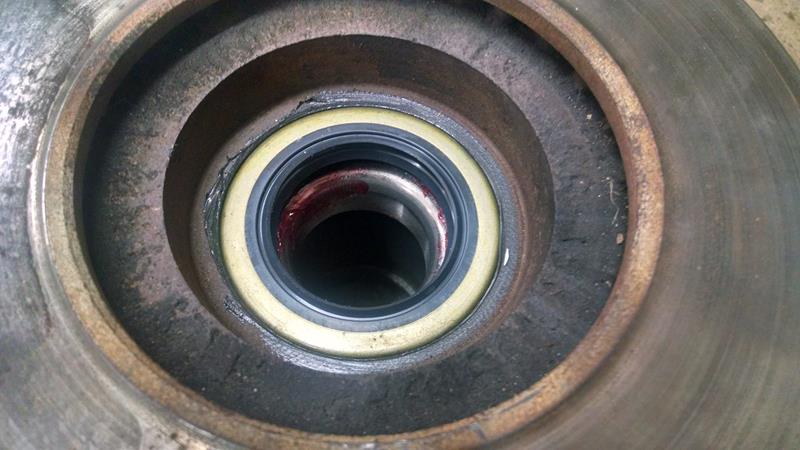
I determined that the leak was coming from the back side of the hub. I don’t think the leak was from the axle seal, but was coming from the o-ring that sits under the stainless sleeve.
During my disassembly, I noted there was plenty of grease (oil) in the axle and bearings and the bearings look ok.
After removing the axle, I removed the sleeve by using a small brass bar, a tapping it in the top, then the bottom to get the sleeve to slide off. I then made sure the grease passage was clear and clean by blowing air through the passage.
IMPORTANT – There is an oil/grease passage that is drilled through the center of the axle and exits through the stainless sleeve. Look carefully, there is a small hole in the sleeve, this hole must line up with the hole in the axle when you re-assemble the sleeve. This passage MUST be clear when installing the sleeve and new o-ring or you will not be able to pump new grease into the hub.
REASSEMBLY NOTES
Stainless sleeve:
put the o-ring on the axle, then put a very thin coat of black RTV around the o-ring.
Slide the sleeve onto the axle as far as it will go, line up the grease hole. Slide an old bearing onto the axle and use it as a mandrel to push the sleeve all the way onto the axle. Make sure the grease holes line up.
After the sleeve is in, blow air through the grease passage to make sure its clear.
Rear Seal :
Put a thin layer of grease on the new rear bearing and drop it into the race.
Apply a very thin layer of RTV onto the new rear seal. You can use the white Vault mandrel to tap the new rear seal so its flush with the hub.
Apply a very thin coating of grease on the lip of the seal, and also on the stainless sleeve. Slide the hub onto the axle.
Assemble the front bearing, axle nut, and cotter pin.
Fill the axle and the vault hub piston with Hybrid oil as per their instructions.
Wipe the inside of the hub surface clean and install the o-ring.
Apply a very thin coat of RTV on the Vault hub cover and use the white plastic mandrel to press the cover on.
When the hub is on, the “Vault” black piston should be protruding from the hub about 1/8 of an inch.