
 We’re packing the Mirada to get ready for our winter road trip, and all the sudden, the microwave turns on and starts cooking !!!!!!. WTH …
Nothing was in the oven and it turned off when the door was opened. But when the door was closed, it tried to start back up again.
Samsung manufactured microwaves specifically for the RV industry in the early 2000’s. These microwaves were known for starting up on their own and in 2004, Samsung issues a recall to replace a defective keypad. READ HERE
Here we are 12 years later. I’m not sure if Samsung will still honor the recall, I’ll check into it after the holiday.
We leave our Mirada plugged into shore power year round, so I’m not sure if the microwave had turning itself on during those months it was plugged in but unattended. With the age of the microwave and the uncertainty of the condition, I decided to replace the microwave with a new model.
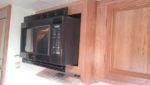
I removed the old Samsung to measure the opening. I was surprised that the top and bottom vent pieces were actually part of the microwave, and were used to mount the microwave in the cabinet opening.
The size of the opening was 22 wide by 14 tall by 17 deep. A visit to Walmart scored an 1100 watt Hamilton Beach microwave it that would fit perfectly for $63.
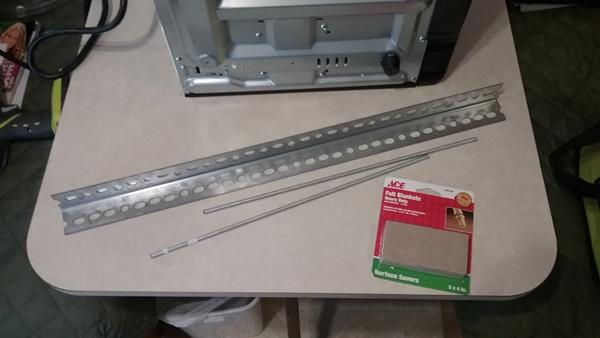
I removed the old unit and then removed the top and bottom vent angles from the old unit. There wasn’t any way to re-use the vent angle things to mount the new unit, so I decided to use a “clamp” method. Basically clamp the new microwave into place with two long threaded rods and a piece of angle iron across the top.
I cut two pieces of threaded rod (1/4 x 20 ) 17 inches long, and a piece of angle iron 24 inches long. I bought some thick cork / felt stuff to place on the angle iron where it will rest on top of the microwave.
I drilled two holes in the bottom of the cabinet so they would clear the stove hood. The threaded rods were inserted into the holes and a large washer and nut installed to on the underside. I also installed a nut on the inside just to keep the rods from sliding through the holes.
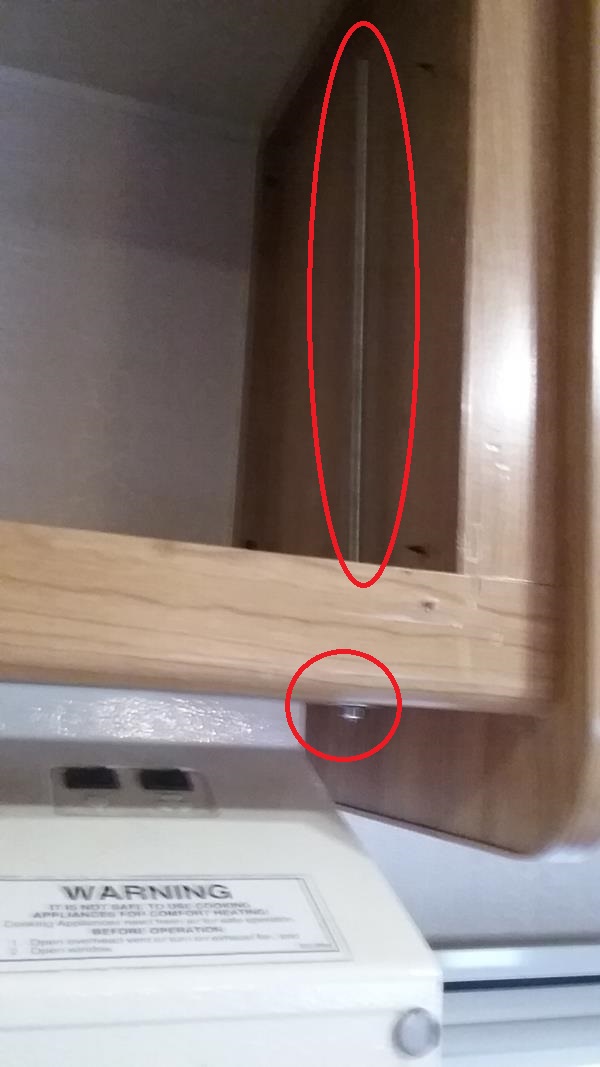
In this photo you can see the rod installed on one side sticking up in the cabinet. The rod has a large washer and nut installed where it sticks out under the cabinet, beside the stove hood.
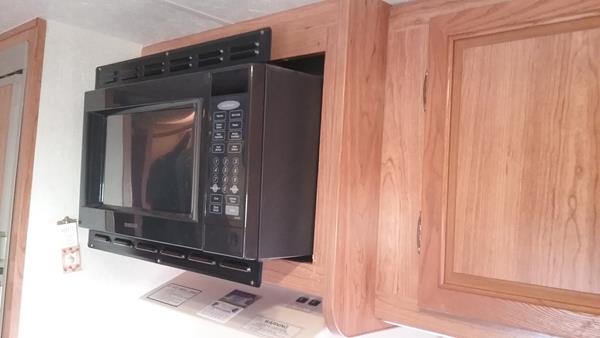
I placed the microwave in the cabinet, There was enough room at the top so I could place the angle iron on the two rods. I then installed a large washer and nuts on the top and snugged them down, effectively “clamping” the microwave into place.
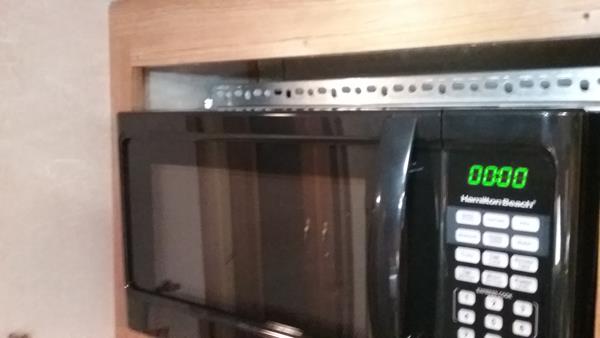
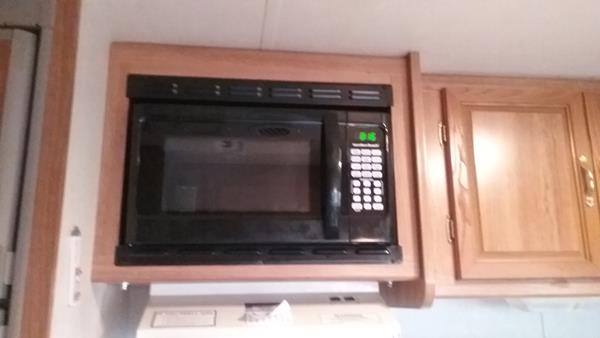
After positioning the microwave and snugging up the nuts (I double nutted bot the top and the bottom to lock the nuts) I then used the old original mounting angle piece as trim for the new oven opening.
The size isn’t perfect, the trim leaves about a 3/4 inch gap at the top, but unless I point this out, you never notice it. Also, the gap provides better air circulation for cooling the microwave.
The new microwave heats stuff FAST, so I suspect the old Samsung is worn out, probably from turning on and running unattended.
Very nicely done….