
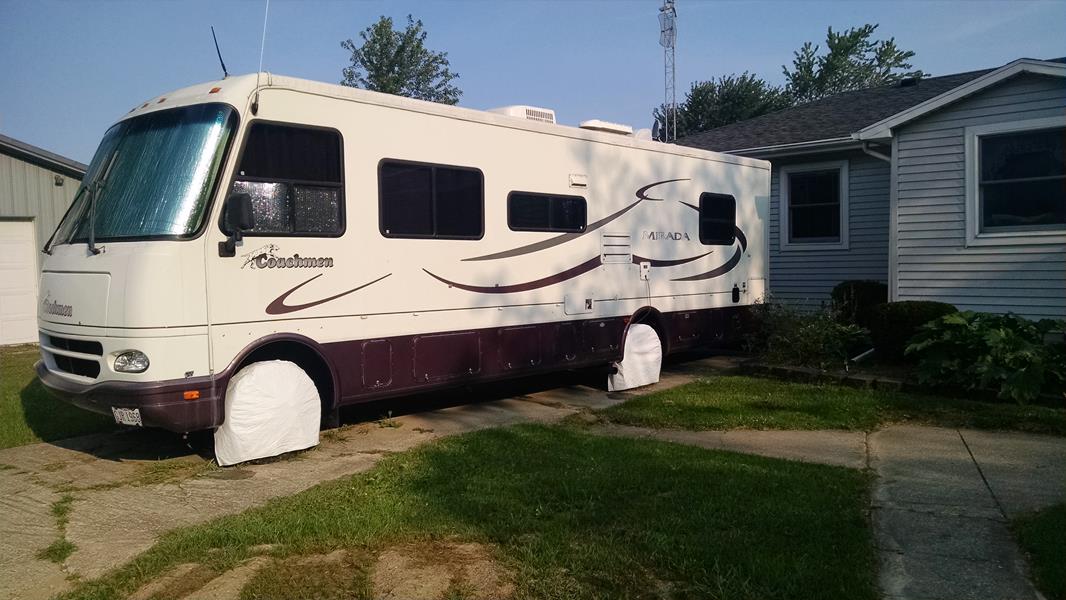
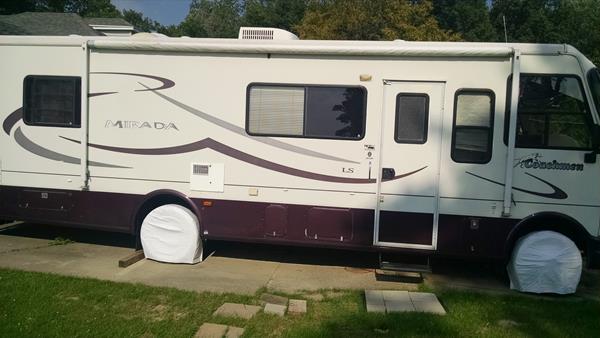
When the sun is shining, a lot of heat comes through the windows, both while driving and while parked. The heat is nice during the winter, but during the summer, the heat from the sun keeps the A/C working overtime, especially when we’re traveling out west.
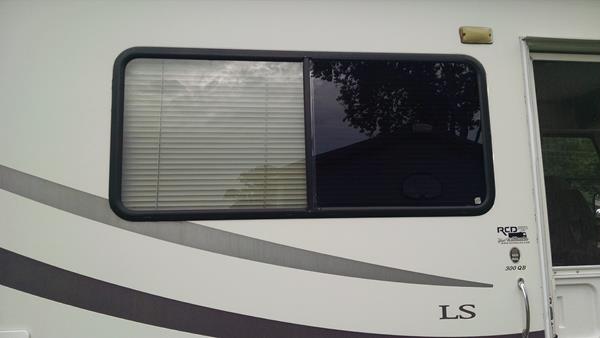
The original windows have a slight tint that blocks a little light, both from outside and inside. Besides letting in a lot of sunlight (and heat) , there is a security issue. When standing outside, you can easily see in the windows.
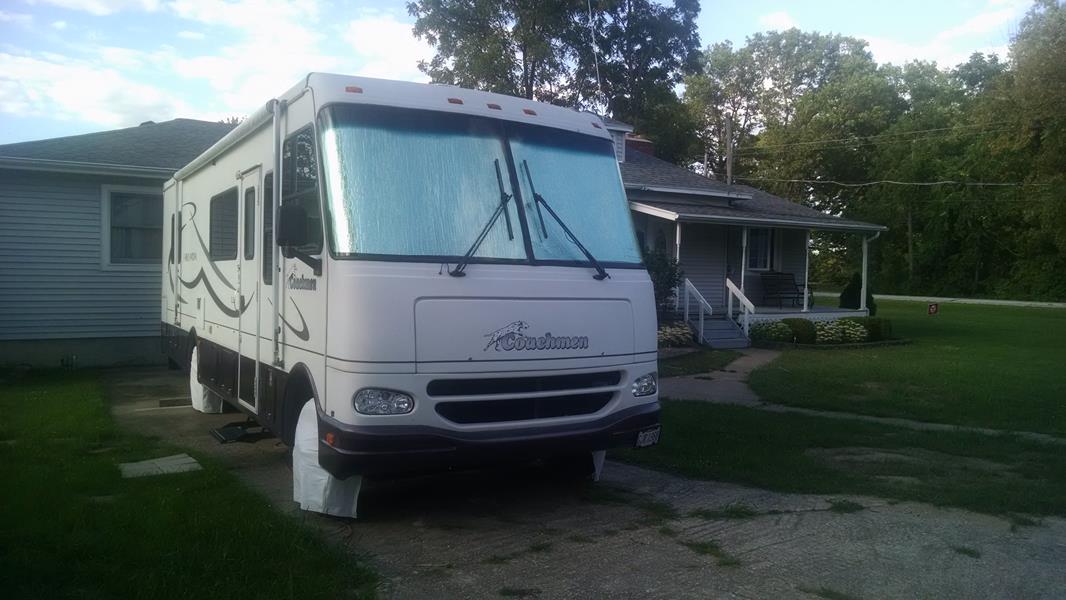
A huge source of sunlight and heat are the large windshields. These are great if your building a greenhouse, but really hurt us when we have the air conditioning running. I looked at several low level tints that don’t block a lot of light, but block most infrared. These were very expensive tints, so I decided to not tint the windshields, but instead would make insulated covers to use when we were parked. More on these later.
SOLUTION – Window tinting and reflective covers.
WINDOW TINTING.
After spending several days learning about tints and how they are installed, I settled on buying a large roll of commercial tint. I figured I’ll use it on the Mirada and maybe even tint some of the windows on my house.
I bought a 48 inch x 100 ft roll of 20% tint on e-bay (Intersolar Tint) . This 20% tint blocks 80% of the light, but more importantly, blocks 99% of infrared, the invisible light that is responsible for the heat.
I also bought an inexpensive “install tool kit”, that consisted of squeegees, razor knife, etc.
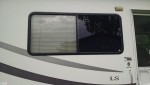
Before doing all the windows, I decided to practice the install on one of the large side windows. This would let me practice on a easy window, and also evaluate the tint before proceeding to do the rest of the windows.
I was very happy with all the above. The optical quality was excellent. and installing the film was easy.
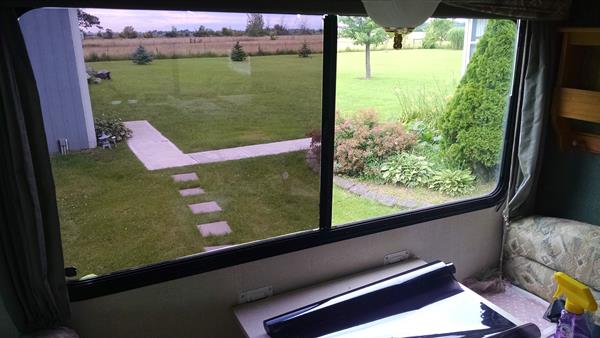
The heat blocking of the film was substantial. In the afternoon, we had direct sunlight coming through the side window and hitting the table. The side of the table that was blocked by the tint was warm, about the same temperature as the air temperature. However, the side of the table that was getting the direct sunshine (no tint) was hot. WOW, big difference.
From the inside looking out, the tint side was obviously darker. but there was no blurring or unusual aberrations. Looking through the windows everything was clear. I was very pleased with the optical quality of the tint film. If I didn’t know this was a film, I would easily say this was factory tint.
From the outside looking in, I couldn’t see the inside of the Mirada.
Nighttime security – Later in the evening after it was dark and I had all the windows tinted. I turned on all the lights and opened the curtains. From the outside, I could see inside but it was much darker. When we closed the curtains, I couldn’t see any signs of light from the inside. This adds significantly to the privacy and security of the Mirada.
INSTALLING THE TINT
Installing the tint was fairly easy. Here are a few highlights;
The tint film has a liquid activated adhesive on one side. The tint film and adhesive are protected by a thin protective film backing. This protective film backing is removed from the tint film just prior to installing the tint film. This is a lot easier said than done. 🙂
1) Clean the window. I used Windex to clean, but then after its clean, I sprayed the window with my solution and squeegee it clean. This is very important as it removes any residue or little hairs or anything that could get trapped between the film and the window.
2) Cut the film to just a little oversize. Test fit it against the window before wetting anything. Spray the window with solution to help move the film around while sizing it. I think the professionals cut it to exact size before wetting or removing the backing.
3) I used Windex on the test window, don’t use Windex.
A soapy shampoo mixture solution works best, it allows easier positioning of the film, allowing it to slide around easier, and the shampoo solution doesn’t evaporate as quickly, allowing more time to work with the film. To make the solution I mixed a couple tablespoons of shampoo with a pint of water and put it in a spray bottle. This worked great.
4) REMOVING THE PROTECTIVE BACKING – Getting the protective backing material off the film is almost impossible. Trick: When your ready to remove the backing from the film, use a couple short pieces of scotch tape, 2 inches long. Place the pieces of scotch tape in the corner of the film. One piece on the tint film side, and one on the protective film side.
Slowly pull the two tape pieces apart, the film will stick to one piece and the backing will stick to the other. As the backing separates, spray the adhesive side of the film with the shampoo mixture, it will help prevent the film from sticking to itself.
5) When the backing is completely removed, spray the film adhesive side and the window with the solution.
6) Place the film on the window, slide it around to position it. When your happy with the position, spray the film with solution. Starting from the center of the window, use the squeegee to work the film and squeegee out the air bubbles. Keep the film wet to make squeegee easy. This will force the bubbles and solution out from under the film.
6) Use a razor knife to trim the film..
Stand back and enjoy the view.
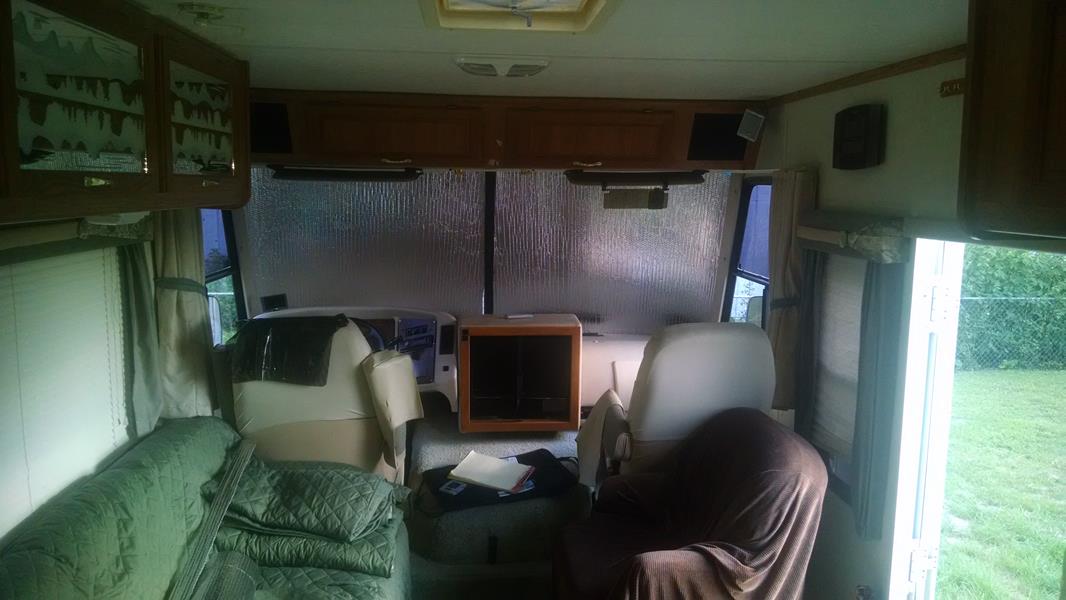
WINDOW REFLECTIVE COVERS
In my Ole Toyhouse I made these covers for all the windows. But on the Mirada, I decided to only make the covers for the windows I didn’t tint. Obviously, the two windshields are like having a big greenhouse and on a recent trip to Arizona and South Carolina, we could fell the heat coming in through the front windshields.
I bought a 48 inch wide roll of the Aluminum bubble-wrap insulating material. This is tall enough to do the two windshield halves.
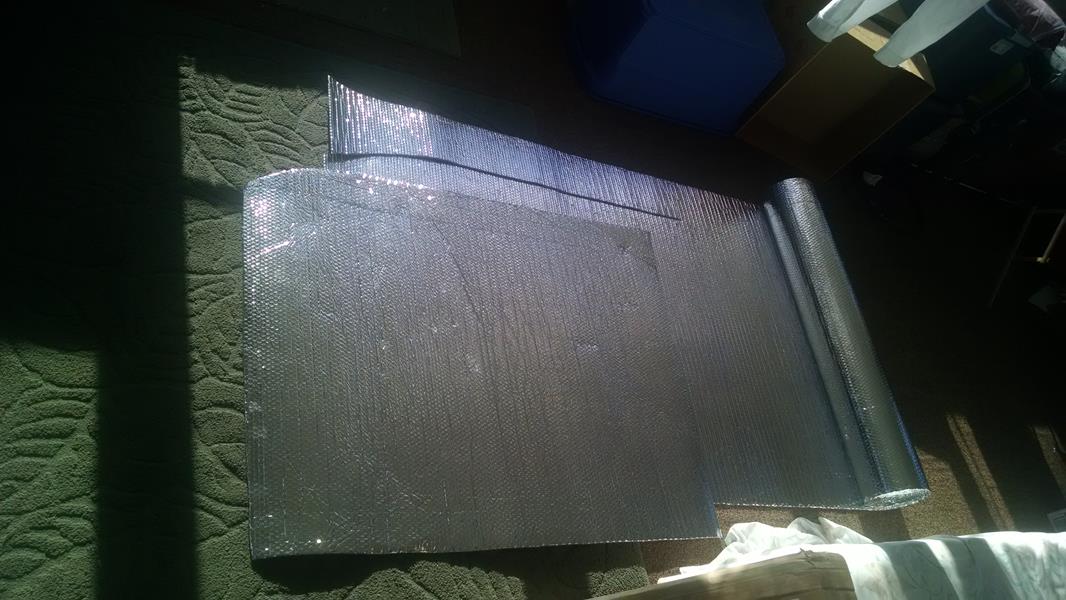
I cut two covers so they would fit up against the inside of the windshield. On my Mirada, there is a 1 inch recess at the top of the windshields where the cabinets butt up against the windshield. I cut the covers so they would fit up into the recesses.
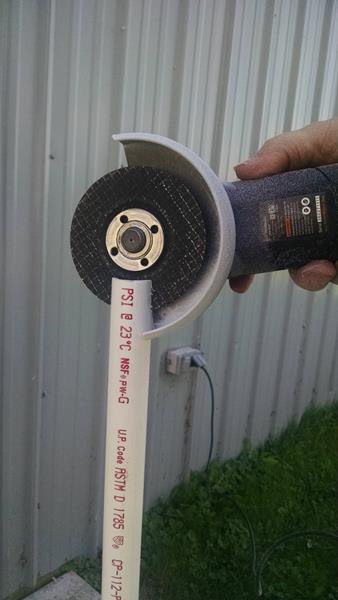
To hold the covers in place, I cut 3/4 PVC pipe to fit up against the foil. The top of the pipe slides up into that groove between the windshield and the cabinet, the bottom of the pipe rests on the dashboard.

When I cut the PVC pipes, I cut the top of the pipe in half for about 1 inch. This formed end can now slide up in the groove.
The bottom of the pipe I cut at a slight angle so when it rests evenly on the dash
Roof Vent Covers – I also cut 4 pieces for the vents. Cut these just a tiny bit oversize. The vent openings on mine were 13 1/2 x 13 1/2 inches.
I cut a groove on one end of the cover so it would slide past the vent crank handle. The covers stay in place by themselves and offer not only insulation, but block the light from entering the covers.
UPDATE – June 2016
On a recent trip to Phoenix AZ, the outside temperatures reached 115 Deg during the day. With the shades pulled over the windows and the covers installed in the windshield and vents, the AC unit was able to keep the inside of the Mirada at a nice cool 75 Deg.