
Last summer when I re-coated the roof, I thought about replacing the TV antenna coax, but decided not to. I should have… 🙁
On our latest road trip, I noticed our TV reception was intermittent and would pop in and out as we walked inside the Mirada, clear signs of a lose connection. I inspected all the cable connections inside and didn’t see anything wrong. The only place left was up on the roof.
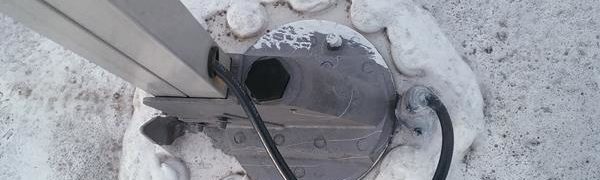
With the antenna up, I checked the coax connection where it screws into the antenna, it was OK, When I looked at where the coax feeds down through the roof, it was very brittle and I could see the shielding. When I wiggled the coax, the coax broke and came apart. I think I just found the problem.
A trip to the local hardware store and I bought a good quality 12 ft RG6 cable that had connectors on both ends.
On the roof, I connected one end of the new cable to the antenna. I cut the other end off so I could fish it through the mast and route it through the roof opening to go inside.
On the inside, I removed the antenna crank assembly and ceiling plate. I poked around in the hole trying to fish the new end through the hole, but the area where the coax feed through was full of roof sealant, URGH…
Back up on the roof, in order to get the coax to go through the roof, I used a long screwdriver as a drill, pushing and turning the screwdriver blade down from the roof, punching a hole in the ceiling just forward of the crank. I cleaned the sealant out of the cavity in the ceiling and now had plenty of room for both the old and new coax cables and connectors.
The old cable was in good shape between the antenna crank and the amplifier, so rather than trying to fish the new coax all the way to the amplifier, I installed connectors on the ends of both the new and old coax and connected them together, and then tucked these into the ceiling cavity just forward of the antenna crank.
A quick test of the antenna proved everything was OK, no more intermittent TV. Now all I had to do was put everything back together and figure out a way to cover the new hole in the ceiling.
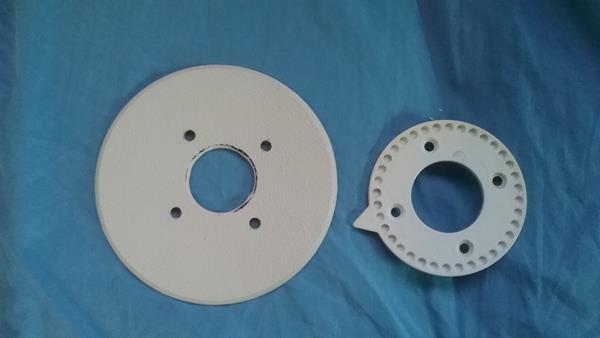
OLD SCREW HOLES
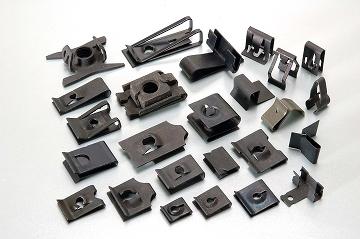
The antenna ceiling crank cover plate was screwed directly to the ceiling, The screw holes were not good enough to re-use, so I bought a couple “nut plates”, similar to the ones in the photo, from the local hardware store. I used a #8 screw plate and the original screws. Make sure the ones you get will fit over a 1/8 inch thick panel.
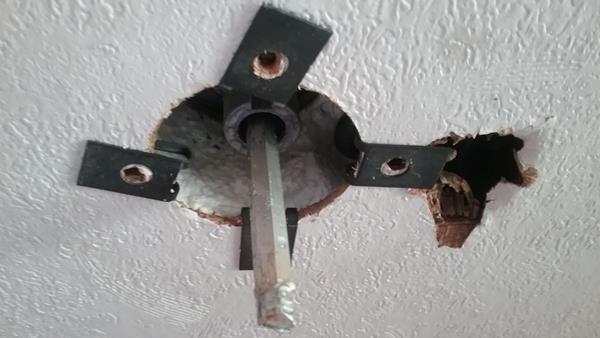
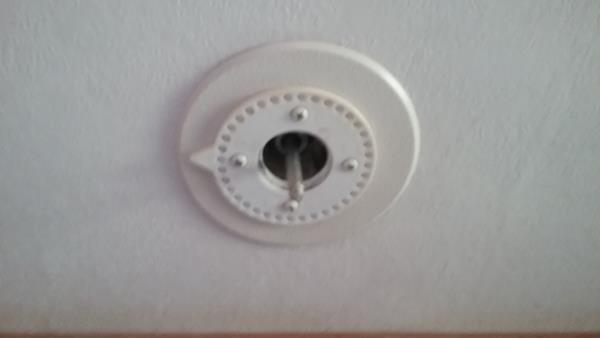
In the above photo you can see the nut plates clipped to the ceiling, To the right, you can see the ugly hole I had to make to fish the coax down from the roof.
COVER THE COAX HOLE IN THE CEILING
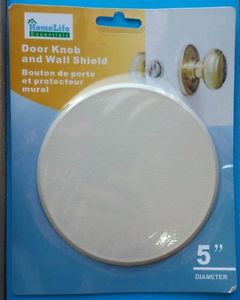
After searching the local hardware store for something that would cover the hole. I found a 5 inch diameter door knob wall protector. PERFECT.
I used the ceiling plate to mark the holes I needed in the door knob protector. I intentionally marked the protector slightly off center so the plate would stick out a little more on one side.
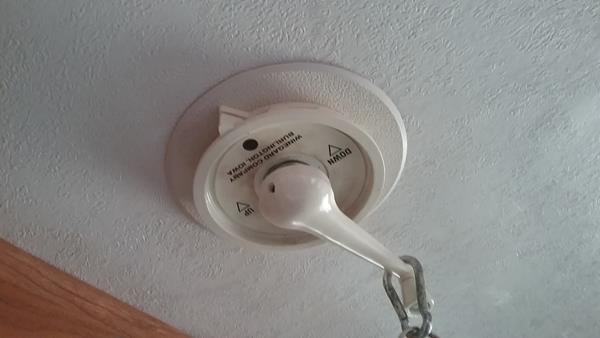
With the nut plates and door wall protector, I re-installed the antenna plate and the antenna crank. If you look carefully, the right side sticks out a little farther than the left
The entire ceiling looks factory installed and there is no visible sign of the coax hole I had to punch in the ceiling
LUBRICATE ANTENNA
The antenna probably has never been lubricate. With a can of silicon lube, it was back up on the roof. There are two points that need lube, The worm gear / bearing, and the main swivel bearings.
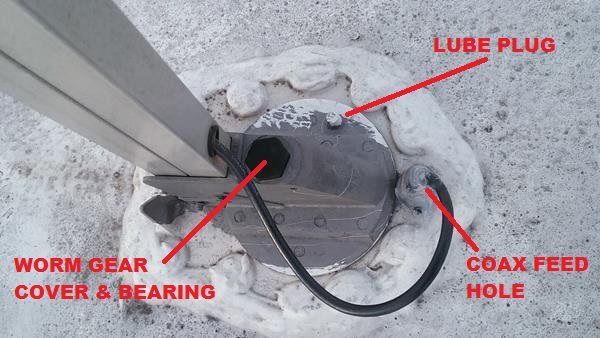
With the antenna all the way down, turn the antenna crank 1/2 turn up, this will allow the crank worm gear to move freely inside the bearing when you remove it, and also expose the gears on the antenna. The plastic hex is the bearing; when you remove the hex nut, you’ll see how the worm gear rides up inside the hex nut thing. This is the bearing for the worm gear.
Spray the antenna gear, the worm gear and inside of the hex nut with silicon spray. Reinstall the hex nut. If possible, have someone inside crank the antenna up and down a couple times while you spray the gear.
Remove the rubber plug and spray silicon down the lube hole, this lubricates the swivel bearing.
You can find the Winegard manual HERE.