

 The bathroom was originally wired with a standard ole two bulb ceiling light fixture. OFF – ONE BULB – BOTH BULBS.
If I used the bathroom at 3am it was either take care of business in the dark, or fumble around with the ceiling light and be prepared for that blinding light when it came on.
By adding a wall switch that controls the ceiling light, I could kill two birds with one stone, get a wall switch, and convert the ceiling light from an OFF-ONE-BOTH to a LOW-MED-HIGH.
Part of this conversion was upgrading all the 1141 bulb fixtures to LEDs. You can read about it HERE.
DESCRIPTION
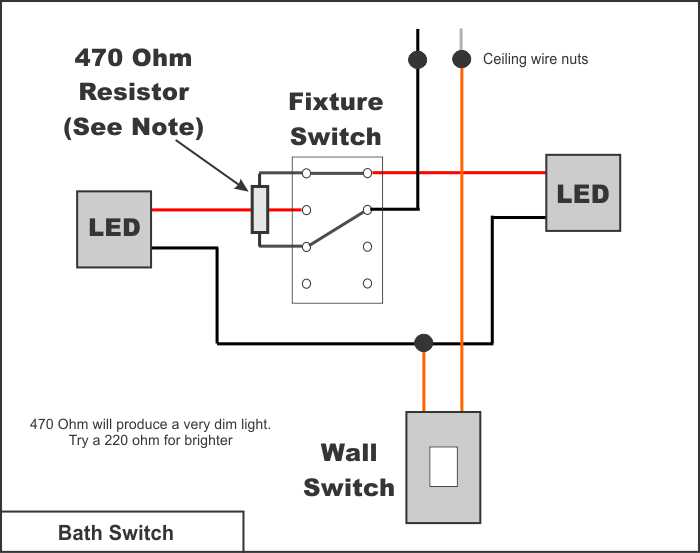 Photo 1 – Wiring Diagram
The ceiling fixture switch has three positions, OFF – ONE – BOTH. When the fixture is in the OFF position and the wall switch is turned ON, Power to one of the LED panels is supplied thru a 470 ohm, 1/2 watt, resistor. The resistor reduces the current through the LED and makes it substantially dimmer.
NOTE – You may want to experiment with the resistors to get the brightness level that satisfies you. i.e. try a 220 ohm resistor, it will be brighter than a 470 ohm resistor.
When the switch is in the ONE or BOTH position, the fixture operates normally, lighting 1 or both of the LED panel to their full brightness.
STEP by STEP
I removed the fixture and glued the LED panels directly to the ceiling.
I soldered a 470 ohm 1/2 watt resistor between the switch contact for BOTH and the contact that attaches to the black power wire.
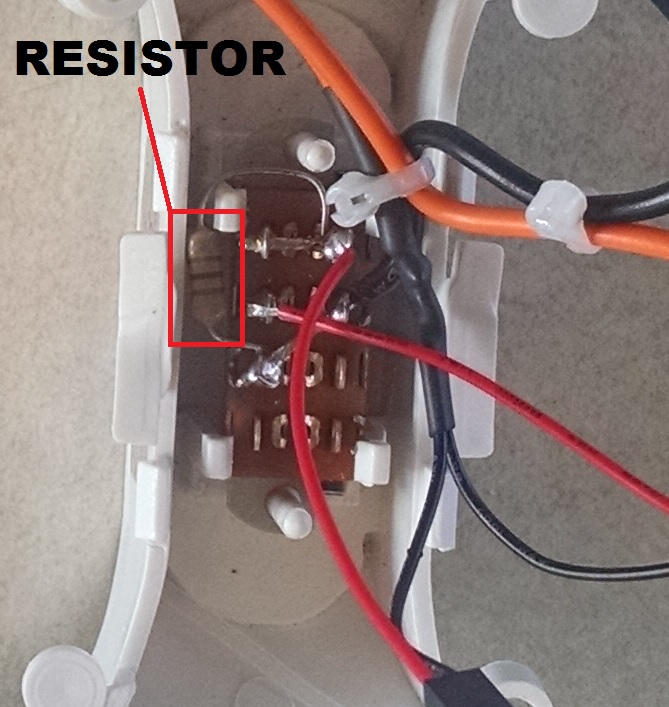 Photo 2 – Solder wires and resistor to switch. Switch rewired LOW – MED – HIGH
Solder the two LED connectors. The red wires are soldered to the switch where the old bulbs were wired. The black wires are soldered together along with a long orange wire (#20 wire is ok) this wire will go to the wall switch.
Another long orange wire is stripped, it will get connected to the ceiling ground wire. The other end will go to the wall switch. Wire tie so things will not vibrate lose.
I used the hot soldering iron to melt groves in the fixture to route the orange wires along the top and to the left of the light fixture to help secure them out of sight when the fixture is remounted to the ceiling See the above photo.
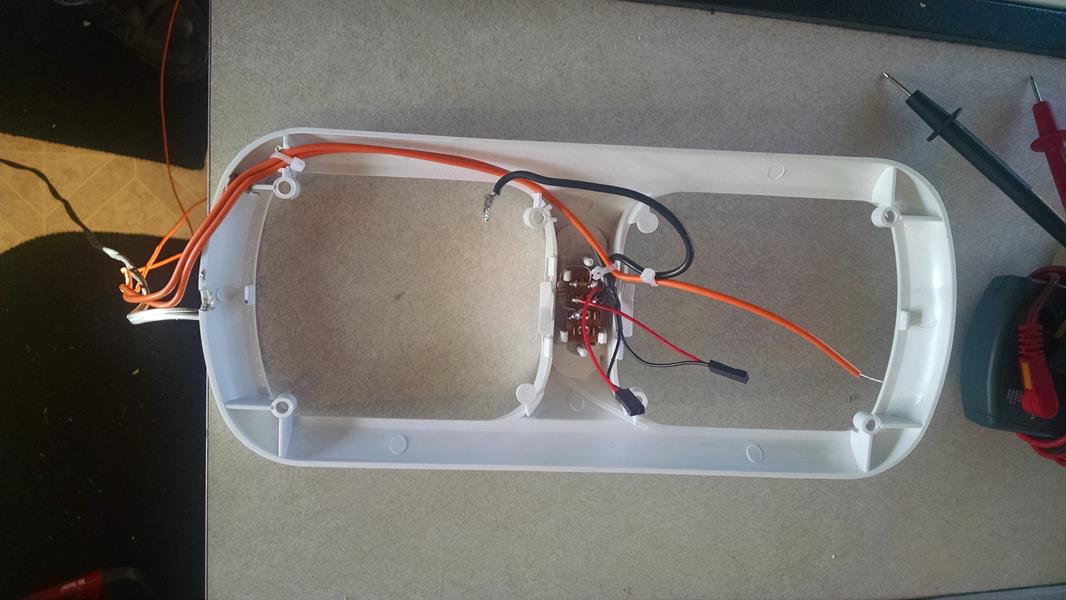 Photo 3 – Switch re-wired in fixture
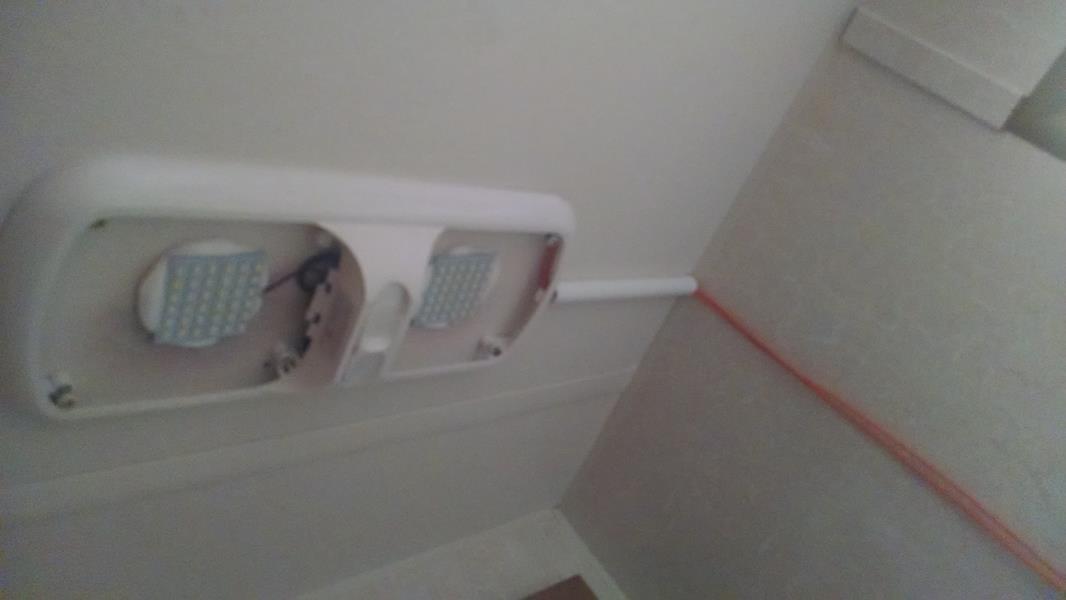 Photo 4 – Fixture reinstalled on ceiling
Mount the fixture back on the ceiling and plug in the LEDs, hook up the ceiling wires.
You should be able to test the fixture by shorting out the ends of the two orange wires.
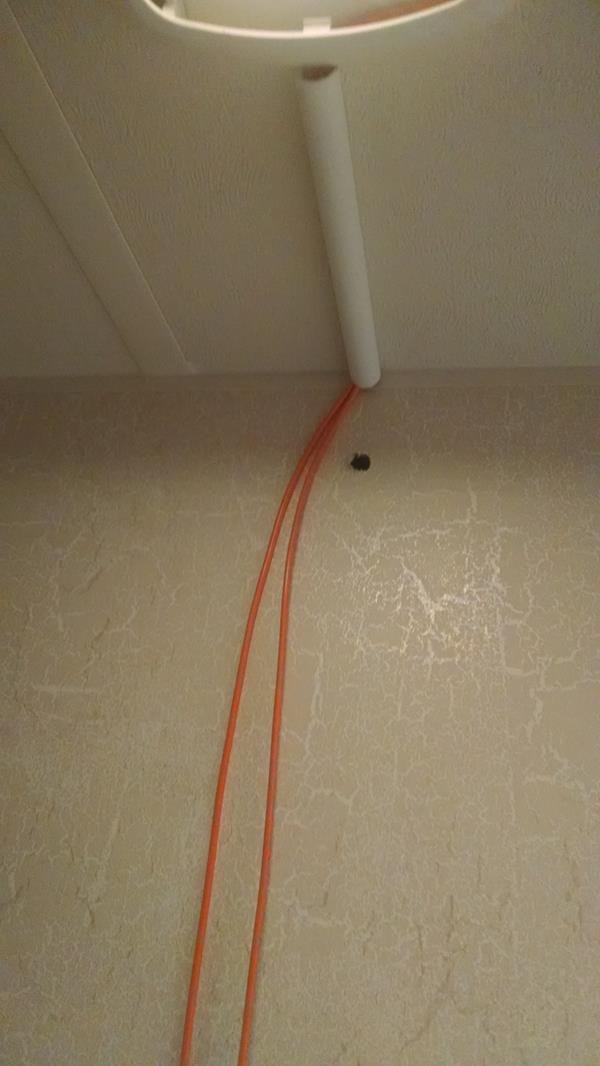 Photo 5 – Hole drilled in side wall
I used a piece of self adhesive plastic wire-mold to hide the wires. They also sell 90 degree turns, etc. for the molding. I used one of the 90 degree turns to hide the wire where it transitions from the ceiling to the wall
On the wall, drill a small hole where the wires will go into the wall, maybe 1 inch below the ceiling. Before drilling, tap on the wall with a screwdriver handle. You will be able to hear where the wall is hollow or when there is a support beam.
HINT – There should be a support beam running across the top of the wall near the ceiling. That why the hole is down from the ceiling a little.
ALSO, On mine, just to the left of my new wall switch is a 2×2 beam that runs vertical, from the floor to the ceiling. Make sure the hole at the top and the switch hole are on the same side of that beam.
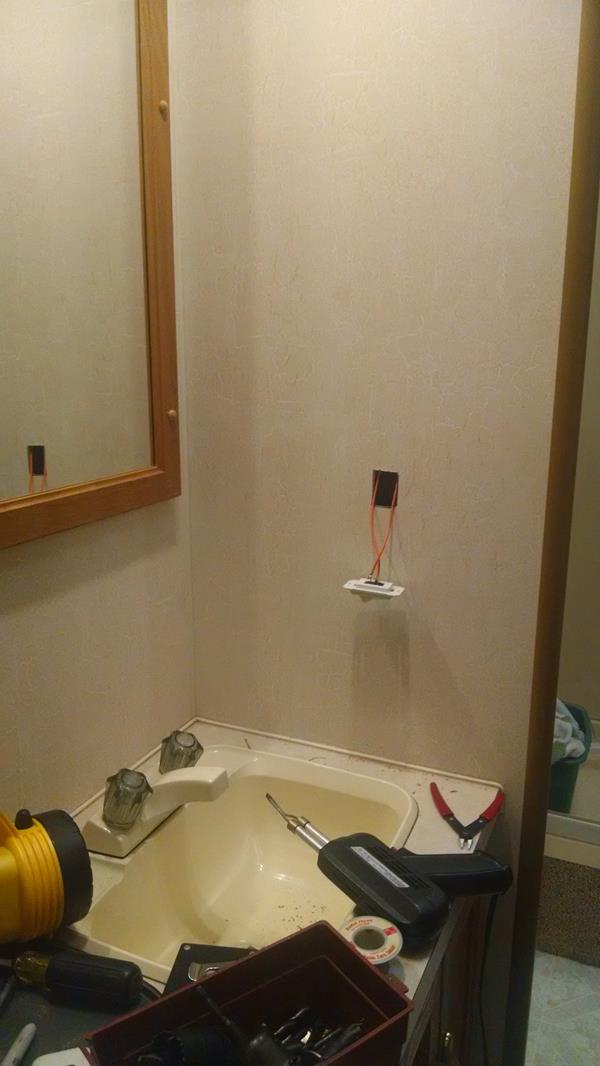 Photo 6 – Hole cut for switch
The switch I used is from Camping World. Using a sharp razor knife, mark and cut the hole in the wall. The switch should fit snugly in the hole.
Fish the wires down from the top. Tape the ends of the orange wires together and push them in the hole at the top, if you wiggle and turn the wires, you should be able to see them in the switch hole.
Pull the wires out and solder them to the switch. verify the switch works, then use two small screws to secure the switch in the wall.
Back at the top, I used a 90 degree wire mold fitting to hide the wires, a small dab of white silicon will hold it in place and cover the hole on the bottom of the turn.
 Photo 7 – Switch installed
OPERATION
Turn the wall switch ON, then move the ceiling switch to the desired brightness. At night when we are finished in the bath, we put the ceiling switch on DIM and turn off the wall switch.
Now when we make our 3am call, just turn on the wall switch and a nice dim light comes on to take care of business.
CLICK HERE to read entire thread on the Coachman and Mirada Spoken Here forum.