
 I didn’t have any of the normal “water-pump going bad” symptoms, i.e. leaking at the weep hole, bearing play or noise, etc. I was having problems with a chirping serpentine belt and wanted to closely inspect the pulley and the pump shaft.
My Mirada is 15 years old with 70,000 miles on it, so I made the decision, since I’m going to all the trouble to remove the fan-clutch and pulley, I’m almost there so I may as well put a new water pump on it. I’m glad I did. A new GMB pump runs $35 from Rock Auto.
REMOVING THE PUMP
On my F53, there’s enough room to get tools and hands in there to remove the pump. You can see a little bit from underneath, but you can’t get your head in there to see the pump from the top.
I lay a heavy tarp on the engine and just lay on top of the engine when I’m working on it.
1) Drain the radiator. The drain plug is on the drivers side, bottom back of the radiator. You’ll need at least a 5 gallon bucket. Remove the overflow cap to speed up the draining.
2) Remove the serpentine belt.
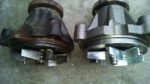
3) Removing the fan clutch.
The fan clutch is screwed onto the end of the water pump.
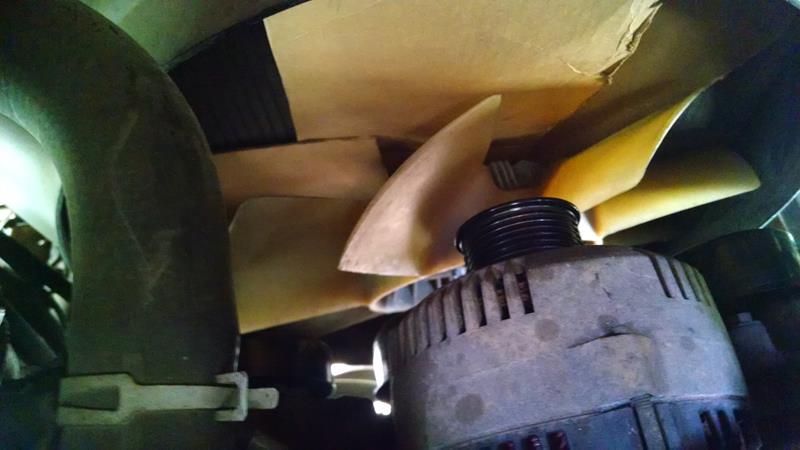
I didn’t plan on removing the cowling or the pulling the clutch and fan all the way out. I was just going to lay the fan and clutch inside the cowling and replace the water pump.
To protect the radiator, I cut several strips of cardboard 8 inches by 24 inches. I’d slide these these down between the radiator and the fan just after I got the clutch loose. These would protect the radiator fins from the fan and clutch.
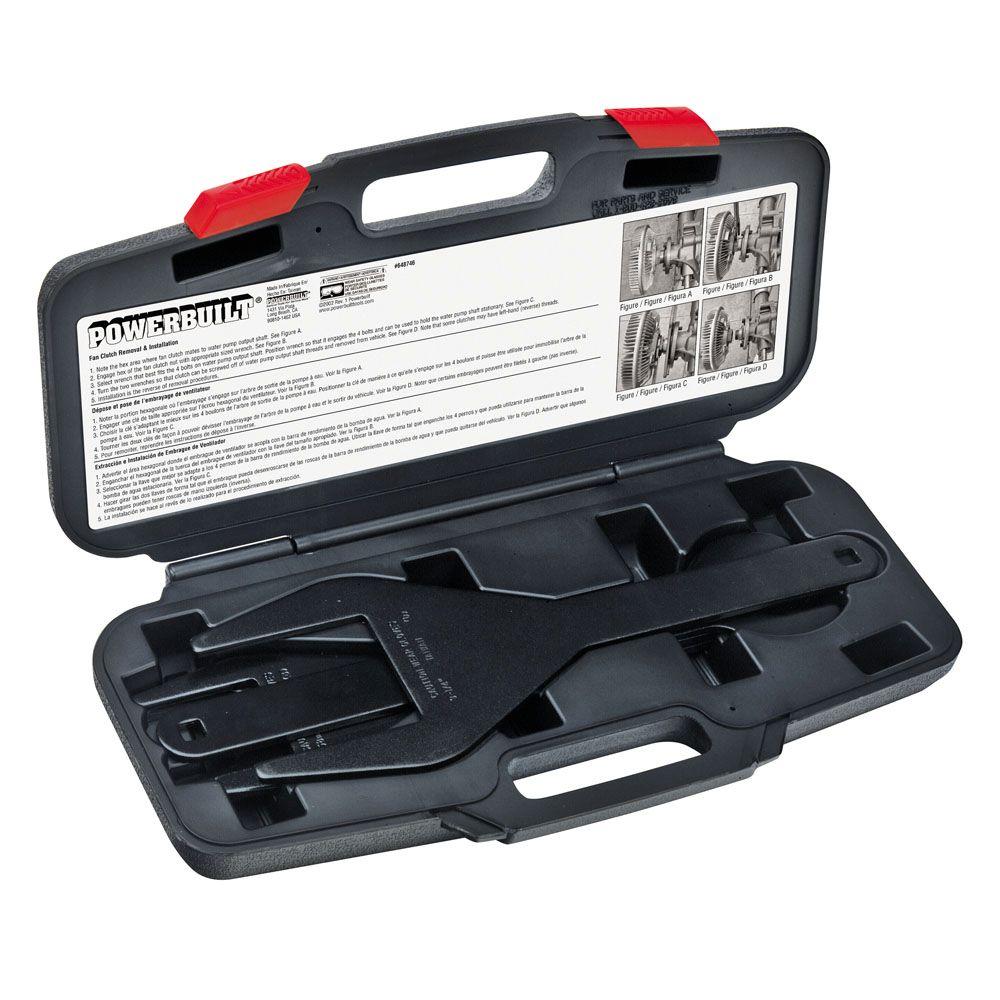
I borrowed a set of water-pump clutch wrenches from Auto Zone. Basically, you but the set, then they give you your money back when you return them.
From the bottom, I used one wrench to hold the water pump, and the other wrench I loosened the fan clutch. I was pleasantly surprised as how easy these came apart. (It was like, I moved the wrench a little, I thought the wrench fell off, but the nut was now loose)
The water pump wrench captures the four bolts on the pulley. The fan clutch bolt thread is normal thread (not reverse)
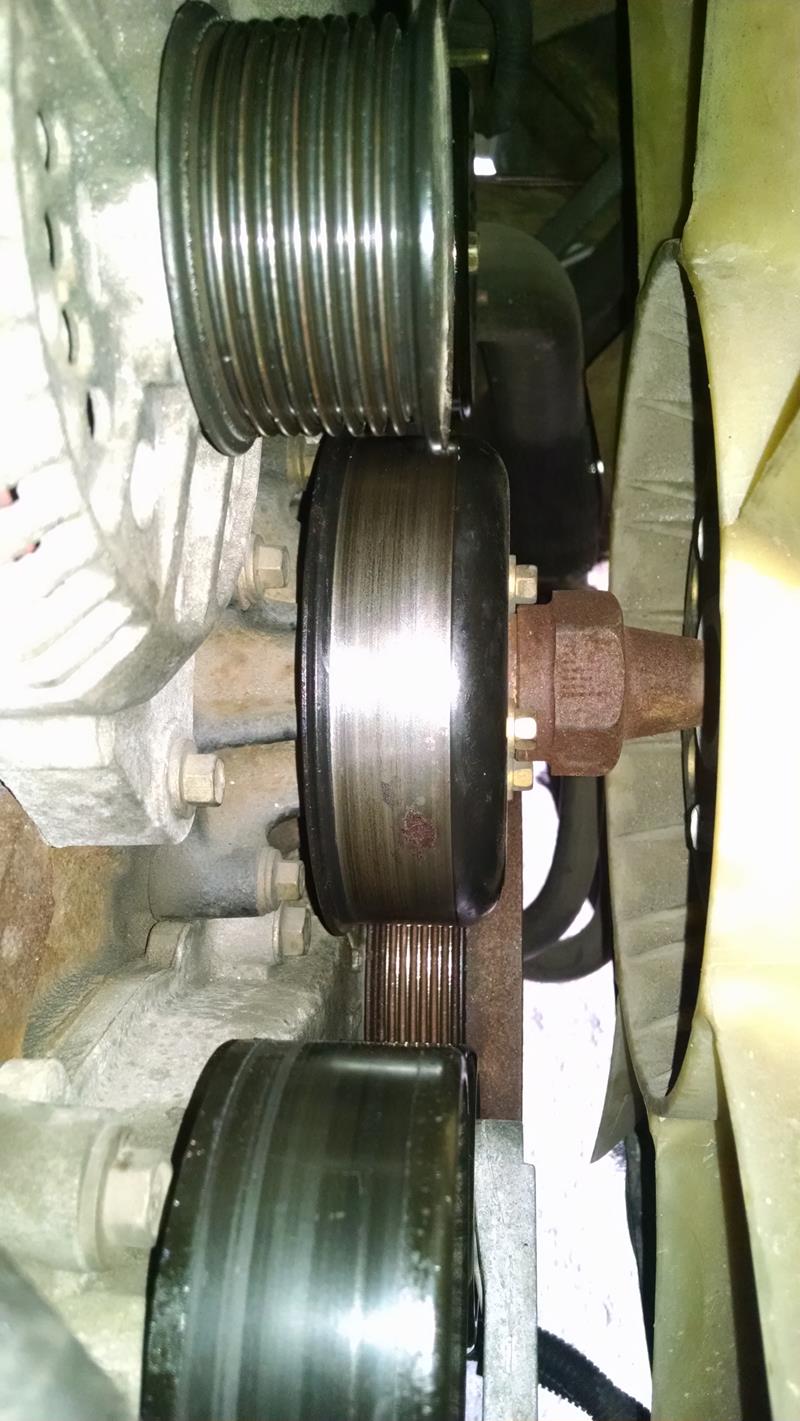
Once I had the fan loose, I went back to the top, I held the fan with one hand and turned the water pump pulley with the other to unscrew the fan.
When the fan came off, I held it off to the side, and stuffed my cardboard pieces in against the radiator to protect it. Once I had the cardboard, I placed the fan up against the radiator and off to the side. I now had plenty of room around the water pump
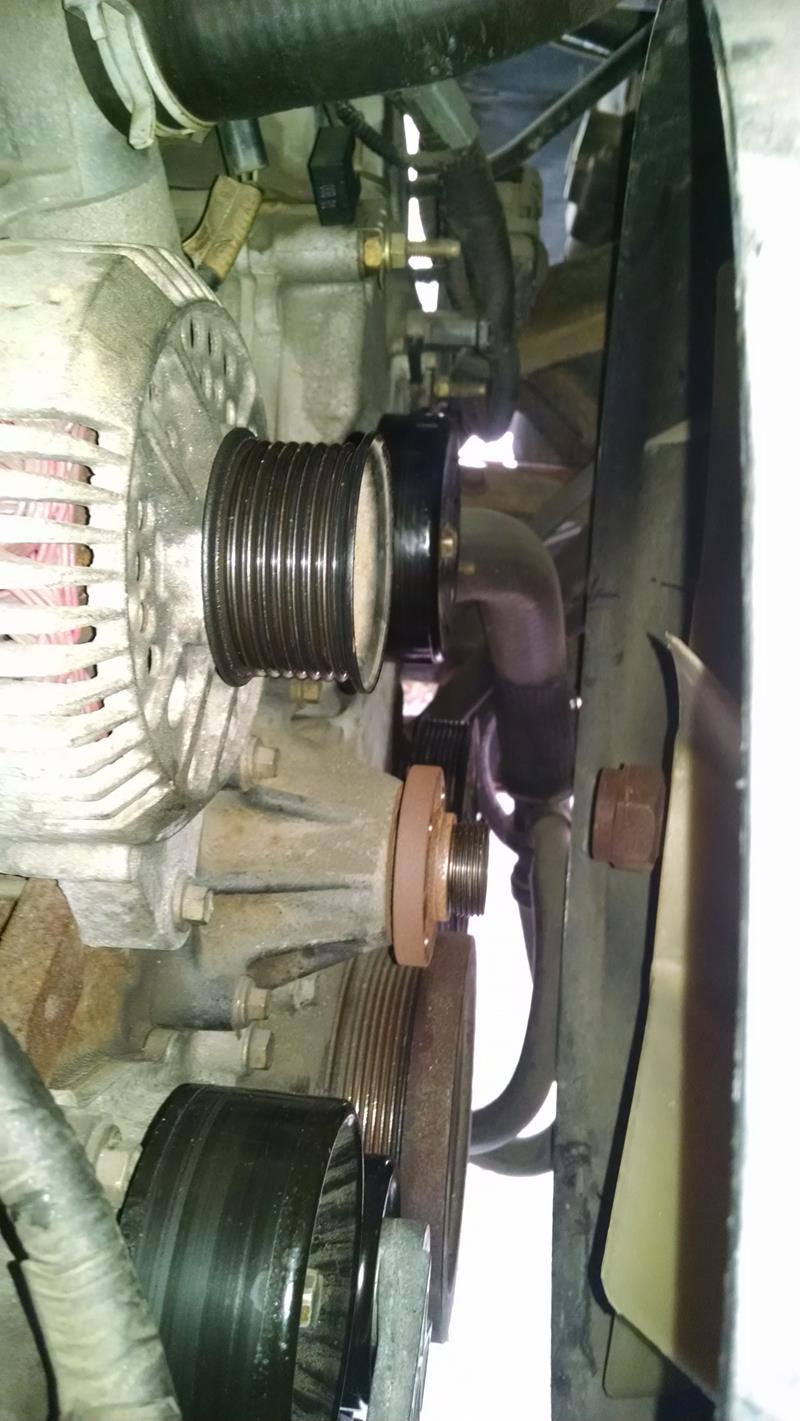
4) Remove the water pump pulley. To remove the four bolts from the pulley, I once again used the large wrench to hold the pulley, and a short socket to loosen the bolts. Get all the bolts loose before removing any of them.
5) Remove the water pump. There are four bolts that hold the water pump on. Look carefully at the new pump You’ll be operating by fell so make sure to identify the correct bolts. Once the bolts are removed, I whacked both sides of the water pump shaft with a hammer to get it to knock loose. I still needed to pry a little from underneath to get it to pop loose.
Before prying, verify that you have the correct four bolts removed.
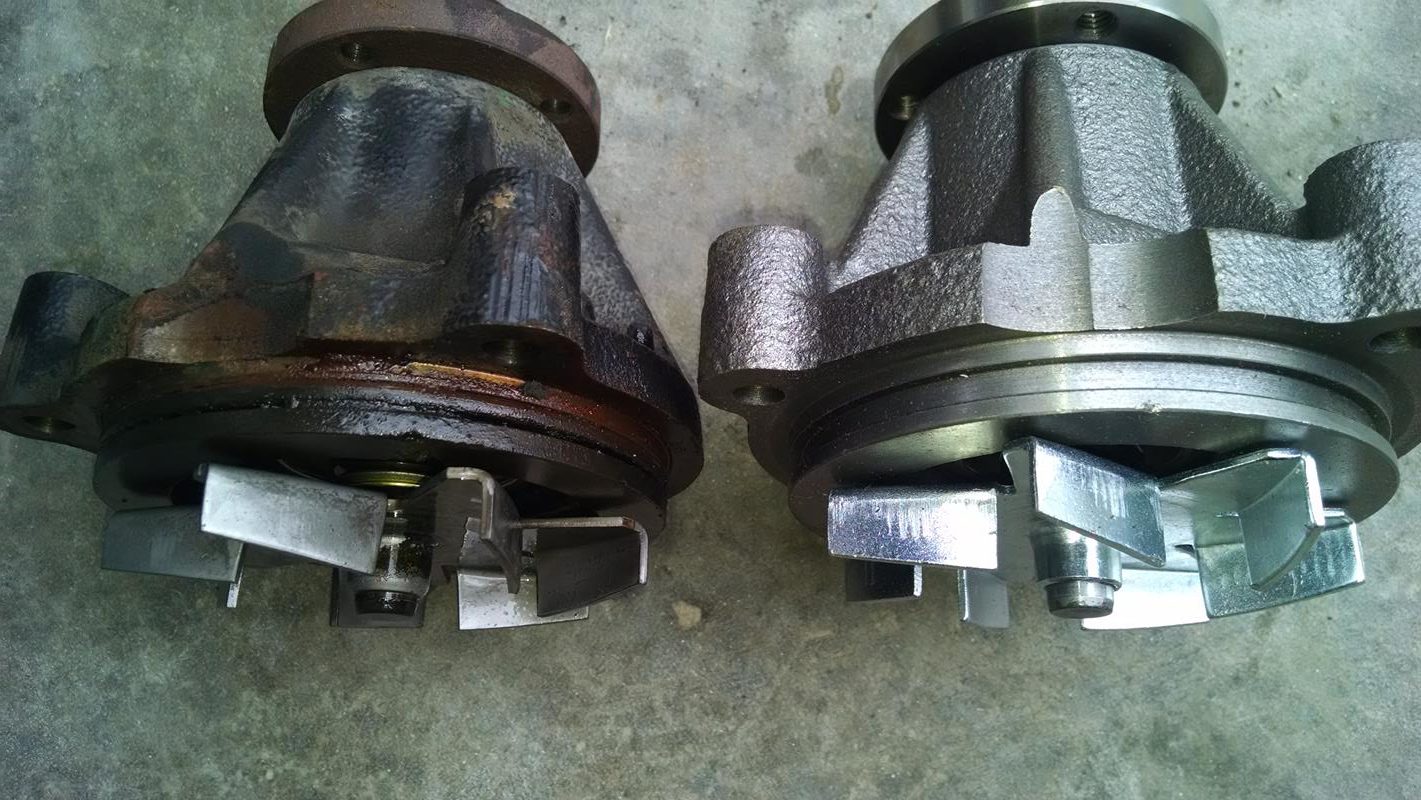
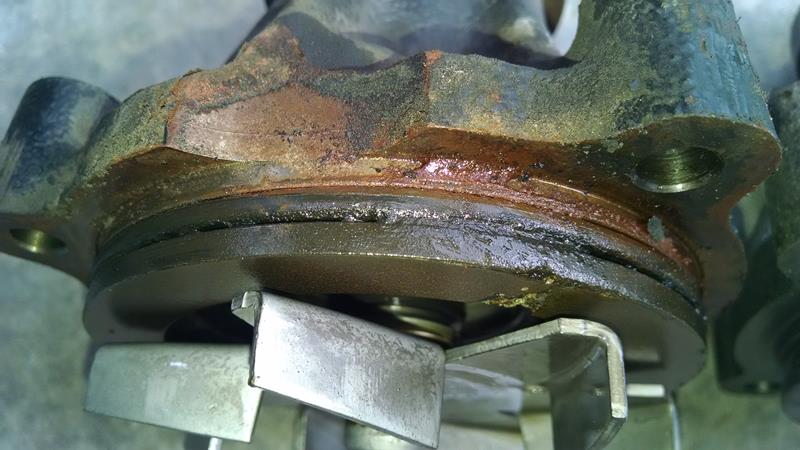
Upon closer inspection of the old pump, I noticed that coolant was starting to seep past the o-ring on the bottom. Its a good thing I decided to replace the pump.
INSTALLING NEW PUMP
Again, the need to operate be feel.
I used some #200 sand paper and cleaned the entire surface on the front of the engine and the cavity where the pump mounts. The surface that the o-ring contacts must be clean.. Wipe with paper towels and feel for any debris. Since you can’t see the cavity, if you have a camera, you may be able to get it down in there to take a photo to check cleanliness.
Wipe the new o-ring with a small dab of silicon paste (di-electric grease), just to lubricate it. Put the o-ring on the pump.
Slide the pump into the cavity, the large indent on the pump is the bottom. It may take some wiggling to get the pump to line up and slide into the cavity, but it should not require any force. Once the pump is in the cavity, start all four bolts and re-verify the pump is all the way in the cavity before tightening the bolts.
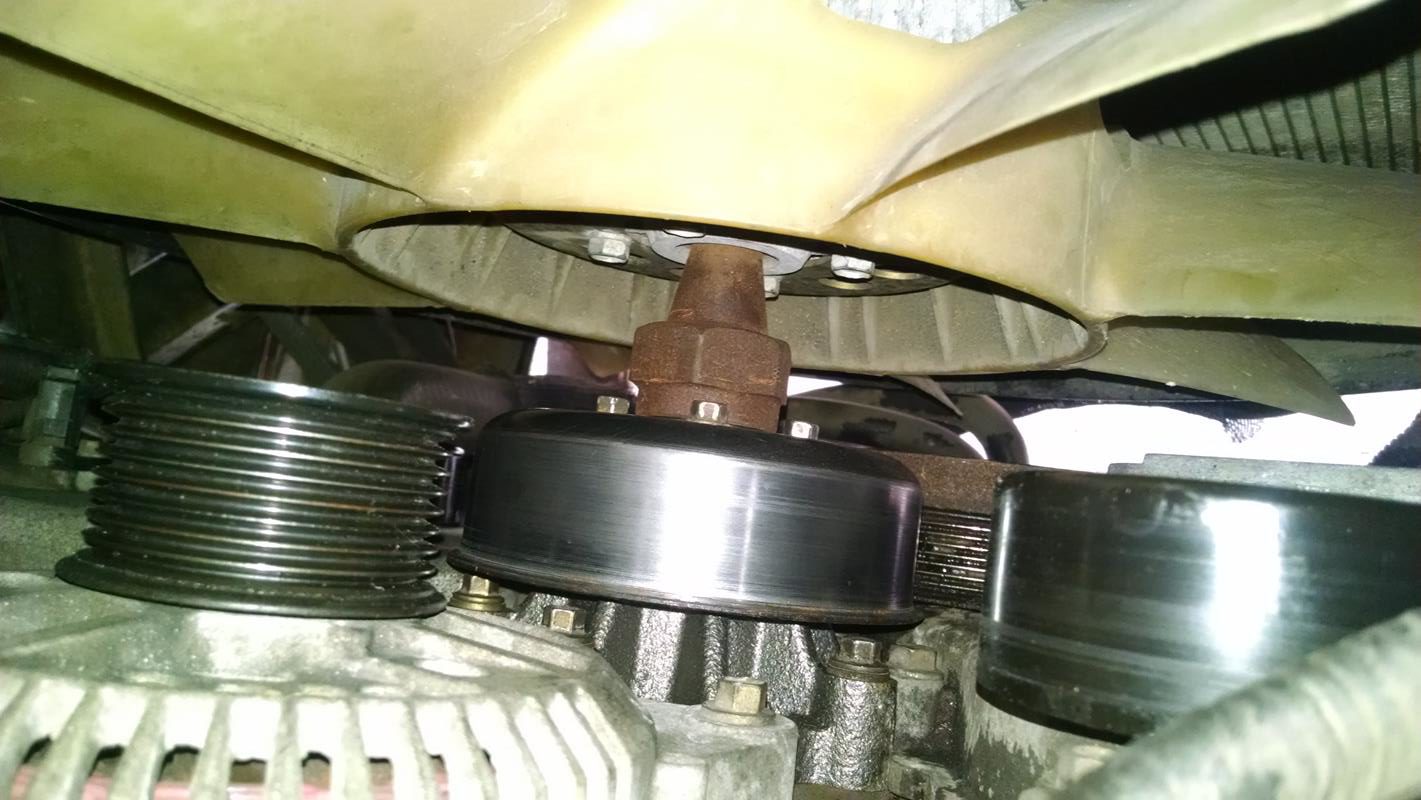
Reinstall the pulley and start all four bolts, use the large pulley wrench to hold it while tightening the four bolts.
I put a very thin film of anti seize on the pump shaft threaded portion before installing the fan clutch.
Before screwing the clutch onto the pump shaft, reach in and remove all the cardboard. I screwed the clutch onto the pump by holding the fan, and rotating the pump pulley with my other hand. Use the wrenches to tighten the clutch onto the pump.
Reinstall the serpentine belt.
Make sure the radiator drain is closed, and refill the cooling system.
Start the engine and re-fill the cooling system.
So, I’ll bite-Did this solve the chirping belt issue? I have a V10 E350, a ’99, that I tow with. The van has 121,000 on it and has been fairly trouble free. I’ve had the alternator replaced, a rear wheel oil seal and speed sensor, a spark plug blew out last year (near home, thankfully) and I did replace the rear diff at 60,000. Other than brakes and oil changes, that has been it. No belt noise and the van is still a great driving vehicle, so I am curious about your experiences. Thanks!
No, when I put the belt back together, CHIRP – CHIRP – CHIRP.
HOWEVER – I pressure washed all the pulleys, used a wire brush to clean the grooved pulleys, and then installed a ribbed serpentine belt. When I fired it up, it was quite. I need to run it a day or two before I claim victory.
I’ll write this up in a few days.